Featured

My First Blog Post

Google Adsense

Be yourself; Everyone else is already taken.

— Oscar Wilde.

Introduction:: 

AdSense is a program run by Google for advertisers to advertise their product across various platforms provided by Google. It is a source of income for creators who create and put up their work on one of many platforms. 

One of such platform is YouTube. It is video sharing website owned by Google. Viewers across the globe search and watch content of their liking produced by various creators. Now the advertisers put up their advertisements before or during the video. Google AdSense works as an intermediate between Advertisers and the creators. Income from the advertisements is distributed between Google and Creators according to the policy previously agreed upon. Creators are paid for the videos monetized by the them. 

To monetize videos on YouTube one must create an AdSense account and get it connected with YouTube. Upon creation of AdSense account, it must be reviewed by the creator. This process takes place after certain criteria set by the company. For YouTube account to be reviewed, one must achieve landmark of 1000 subscribers and 4000 watch hours collectively of all videos uploaded within last 12 months. After successful review the creator can decide to whether monetize the video or not. If yes, then what kind of advertisements to be shown.

Process of creating an AdSense Account::

Creation of AdSense Account is very easy process as shown below in the attached Screenshots.

First, one must create a Google account and open the same in YouTube. Upon opening the account in YouTube, one has to open ‘My Channel’ and follow the following steps.

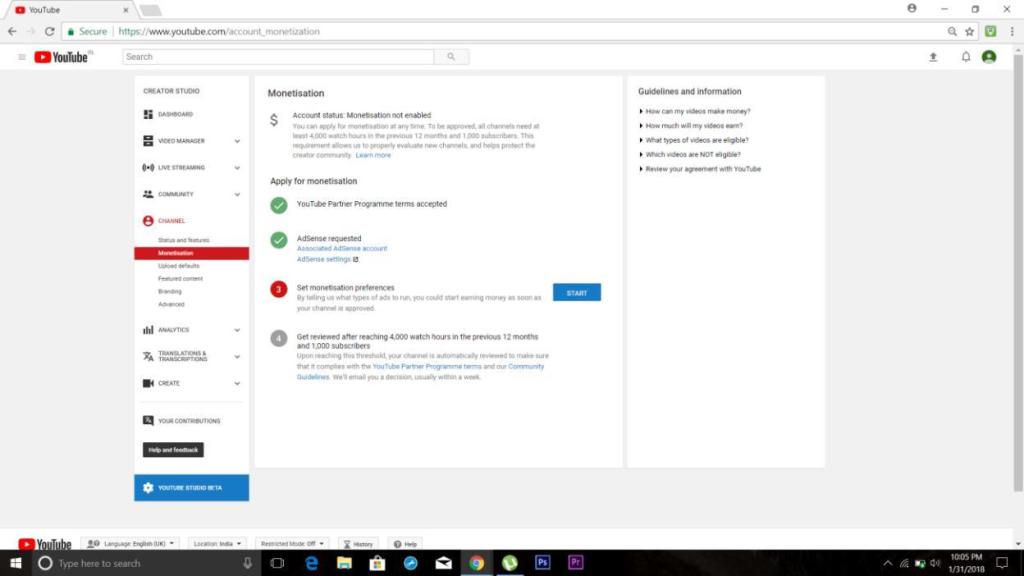
1)Enable ‘Monetize’ tab.

2)Apply for monetization by following four simple steps.

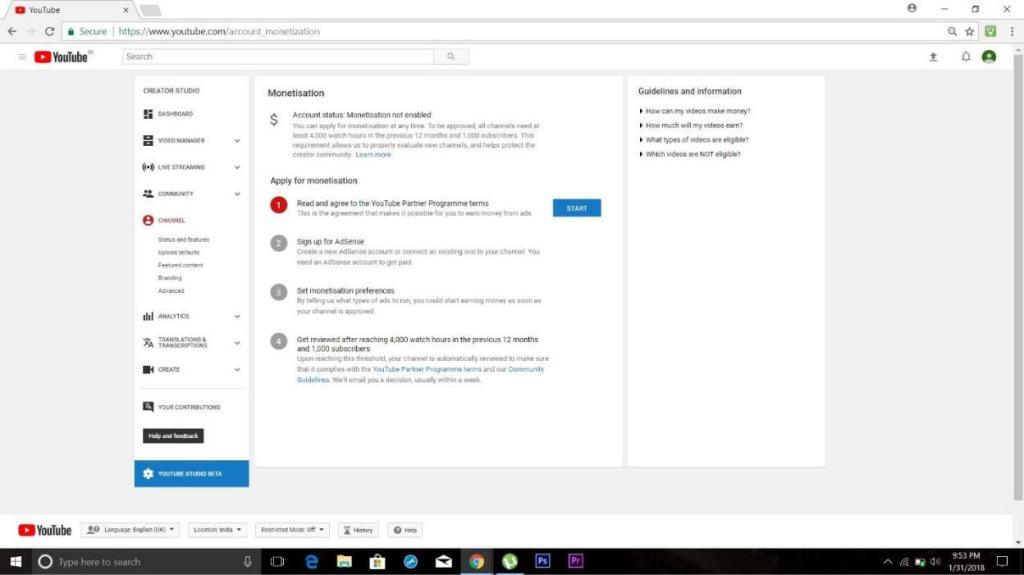
3)Read carefully and agree to the TnC.

4)Sign up for AdSense.

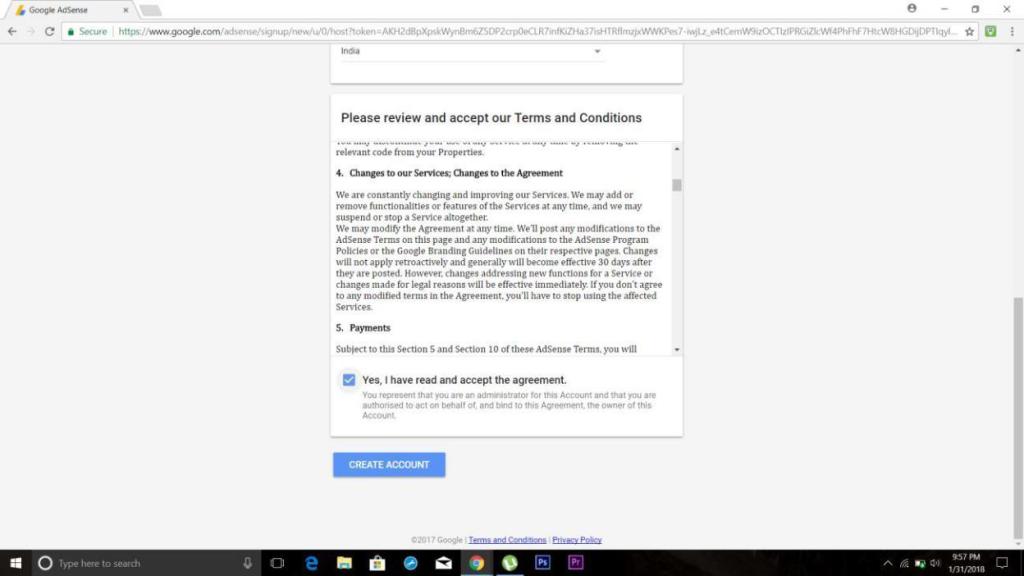
5)Fill up basic Detail like country etc.

6)Check the box showing you have read and are agreeing to their policy.

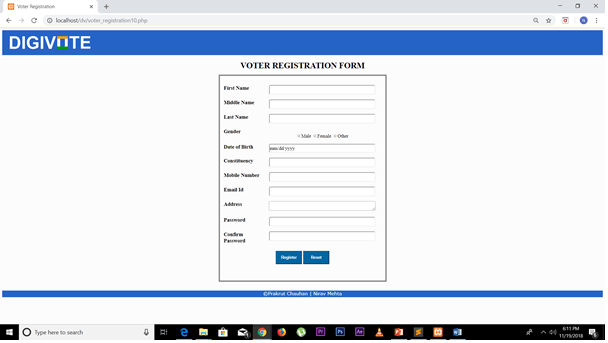
7)Fill up your details as such Name, Address etc.

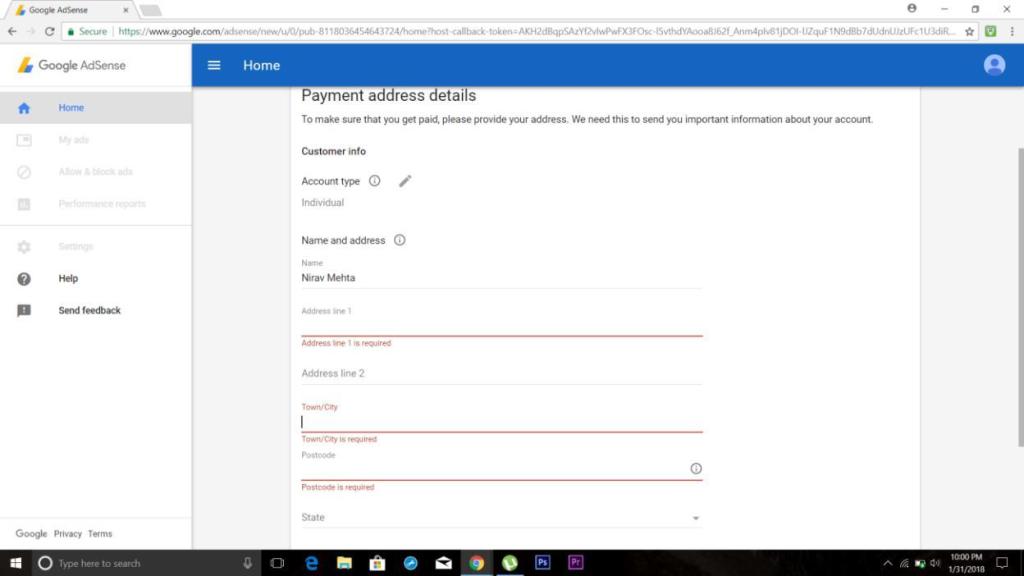
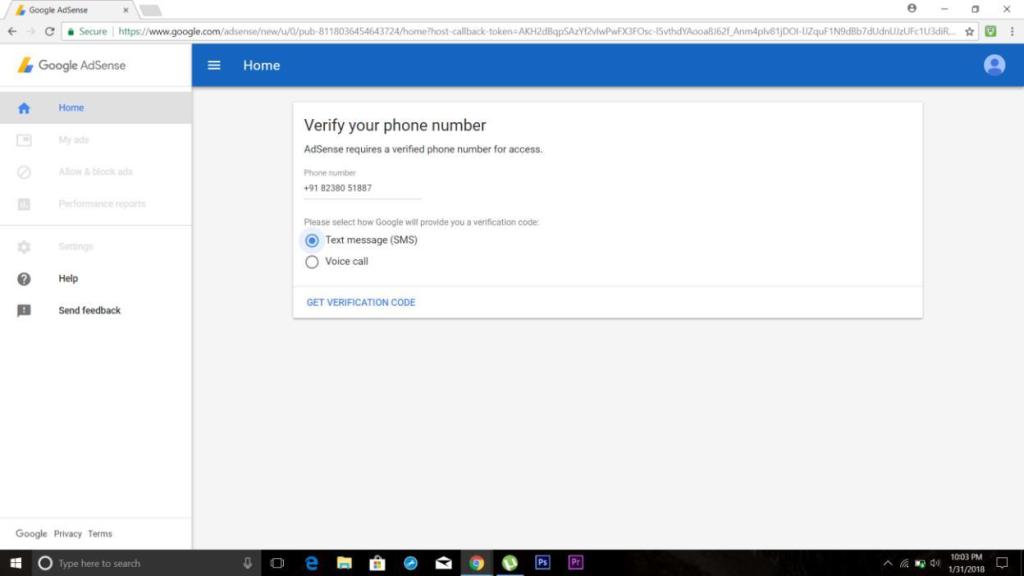
8)Verify the mobile number by entering the OTP sent on the said number.

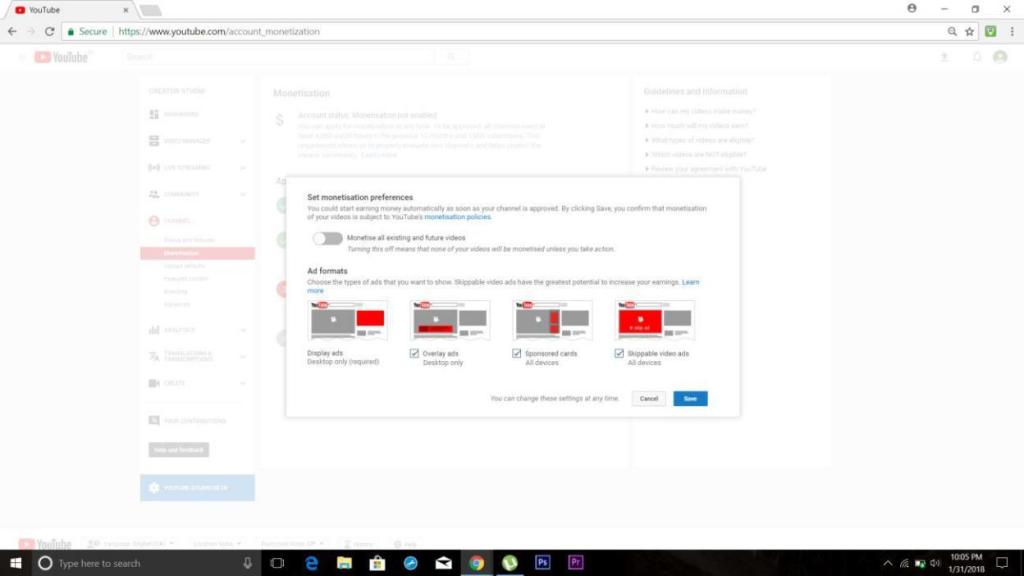
9)Set the preferences as to which format ads to be shown(can be changed later).

11)Select format.

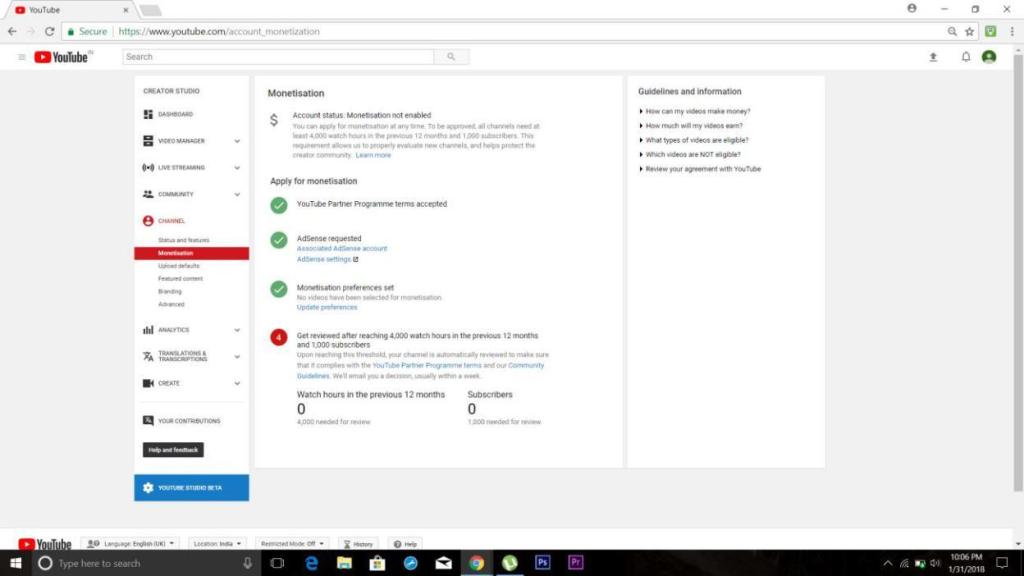
12)Wait for the prerequisites for review to be fulfilled for further process.

Modification recommendation:

Certain recommendation which YouTube can work upon to provide a better experience to it’s creators are:

1) People who subscribe and like the video:

YouTube doesn’t show the list or names of people who subscribe to the channel or like the video. Notification of new subscriber is obtained but a proper list of people who subscribe is not available.

Also, the audience and their information who likes the video is not available. Creator can target a set of audience if he gets the information like geographical location, their profession etc. and increase his/her reach.

2) Profession of visitors/subscriber/likers:

This is a vital piece of information that YouTube doesn’t provide. If creator gets to know the profession of his/her audience, he/she can make relevant videos and can gain popularity and reach as well.

Alternatives to AdSense:

There are many alternatives to AdSense currently available in market.

To name a few:

1)AdRev

2)Filmsection

3)Freedom

4)Fullscreen Media

5)VidGenX The second-best option to AdSense is AdRev, according to popularity and services provided. It provides similar services like AdSense. Inorder to use AdRev, one must create a YouTube channel.

Digital Voting

INTRODUCTION

“DigiVote-Website for conducting elections” allows the setting up of polls and the users to exercise their right to vote through an online platform.

DigiVote is an e-voting platform. E-voting or electronic voting technology that aims to speed up the process of an election by efficient counting of votes, reducing the cost of manpower to count votes and can also provide accessibility for voters who are disabled. The platform will allow the administrator to add candidates for an election and the users to vote for the candidates of their choice. It will be a secure platform that will prevent impersonation and unauthentic voter registration.

Goals

  • Allow organisations and individuals to elect representatives, leaders, and members.
  • Ensure voter anonymity.
  • Create an unbiased, trust able and reliable voting platform.

SCOPE OF WORK

The scope of the project “Refurbished book sharing system” is to build online e-commerce website on which users can buy and sell their used books. This project can make sharing of used books easy to use, safe, efficient and fast.

LITERATURE SURVEY

Literature review was done based on needs and requirements of the project. Web technologies such as HTML, CSS, JavaScript and PHP were studied. Apache and MySQL have been used for sever and database. Existing voting platforms and actual registration and voting processes were explored.

LITERATURE REVIEW

  • Existing online platforms for voting such as E-Ballot, ElectionsOnline, Simply Voting etc. were explored to learn about the various features and implementations of e-voting platforms.
  • For voter registration, the registration process to get voter-id card through Election Commission of India was studied.
  • Applications and limitation of Aadhar Card for our project were analyzed. Its compatibility for our project was explored.
  • Various methods for email and phone number verification were studied so to implement them in user verification methods.
  •  TextLocal’s API was used to secure the user registration process by sending an One Time Password on user’s phone number.

IMPLEMENTATION

The project, “DigiVote” is a website that consists of several webpages such as home page, voter-registration page, candidate registration page, login page, user page and admin page. These pages have different functionalities for user registration, poll creation, online voting and result generation.

HOME PAGE   

The homepage of DigiVote displays two buttons that allows the user to either login or sign up for the website.

REGISTRATION PAGE

In this page, the user can signup for voting by filling their details. Several client side and server side validations are performed to ensure authenticity of the user.

Client Side:

  • Data Validation such as name, phone number, email id, password are checked to see if they are in appropriate formant.
  • Age is checked using a JavaScript to ensure that the user is 18 and above.

Server Side:

  • Data Validation – It is assumed that the UIDAI database is available and thus the entered data can be confirmed by comparing it with the data in UIDAI.
  • Email Verification  – Email duplication is prevented by checking in the DigiVote database.
  • OTP feature was tested but it hasn’t been implemented as it is a paid API.
https://lh4.googleusercontent.com/BkGfOcWzaX2arlzTz4vRtEpKU4XDNhonvSOvWb5lT_N0E16OtaNOQPkpMhPKNWe0ThEP773p8SEp5jD1zDKnMudryc5LaZn3tFPkJrFjp5ZUx2GCCMy8IibjybHaYgT8wts3c2BseH0

LOGIN PAGE

In this page, registered users can simply login by entering their registered email id and password.

CANDIDATE REGISTATION PAGE

This page has the same features as that of the user registration page. The party of the candidate is selected from the drop down list.

USER PAGE

In this page, the user can see the list of candidates in their constituency and vote for the candidate of their choice. Once the user has voted, they cannot vote again for that election.

CONCLUSION

The blog has described about the implementation and use of the project, “DigiVote – Website For Conducting Elections”. After successfully completing the project, I have learnt many new things beyond the syllabus. The project required the knowledge of HTML, CSS, JavaScript and PHP.

Although this project is only a simple model, it project can be implemented in real life by proper scaling and modifications. The responsibility of the admin can be given to an organization like election commission of India. Users can register on the website and impersonation can be prevented by using the UIDAI database. DigiVote has the potential to revolutionize the process of voting and conducting elections.

Restaurant Management System

Introduction

Restaurant management software is a collective term for software used to support restaurant operations. This is primarily POS software, but other kinds of software can also be included.

Advantages

Typically, RMS is useful in ordering, billing, inventory management, and queue management.
The advantages of using software to manage restaurant operations include not only increasing efficiency and decrease customer response time, but also preventing employee cheating.

Overall Description

Functionalities:

Following functionalities are provided by the RMS:

  1. Login – Each waiter/waitress has a username and password. With which they can login and take the order.
  • Table management – According to the availability of table the customer is allotted the table. If a particular table is available it is shown with green and occupied table number turns red.
  • Ordering of food – A menu is available for the waiter/waitress. He/she has to just the select the table and the food item ordered by the customer and enter the quantity of food item asked for and as to press update button to update the order every time anything else is ordered. i.e. the order is updated.
  • Separate data for each table – The data for the order of each table is separate. Every time the particular table is selected its order is displayed and it can be appended.
  • Generation of Bill – After the order is finished this button is pressed and a bill is printed, and the table is made available for a other customers and its data is cleared to zero.
  • Calculation of tax with added option of dine-in, take out or delivery – This functionality helps the generation of bill easy. It calculates the total bill with all the taxes. It also includes cost according to the option of dine-in, take-out and delivery.

Working

General flow of the RMS program:

  1. Launch of Software: The software is launched in order to proceed.
  1. Login Screen: To avail the service, the correct username and password are entered.
  1. Selection of table: Out of the available table is selected. Available table is indicated with green color while occupied table is indicated with red color.
  1. Add food items: Whatever the customer orders out of the given menu is entered using the space given beside the respective food item. Quantity is updated.
  1. Bill generation: At the end when the customer finishes, bill is generated with the taxes and the other added charges.

Preliminary Design

ER diagram

GUI windows

  1. Login Screen

Initially when the program is started, a login screen appears. On entering the valid user name and password; a popup will notify that user has successfully logged in and the main interface of Restaurant Management System is opened.

  • Main Interface

After successful log in, user will have access to the main interface and the following features:

  • Table No: To select the table for which the order is being placed.

  • Occupancy: Displays the occupancy of the tables, green indicates free while red indicates that the table is occupied.

  • Dine In/Take Away: This radio button allows the user to select whether the customer is dining in or taking away the order.

  • Menu: There are main categories namely – food items, drinks and desserts. Text field is used to input the quantities. The price and quantity are displayed next to the text field.

  • Total: Cost, taxes and final total are calculated and displayed at the bottom left on clicking the generate bill button.

  • Update: This button is used to update the order value.

  • Generate Bill: This button is used to generate the bill.

  • Pay and Exit: This button frees the table and resets the order to default. To be clicked at the end of payment.
  • Summary

This project is for making the process inside a restaurant very easy. The queue is managed and wait time of customer is organized. Table is managed and order is taken from a particular table. Updating order is also a very easy task. Generation of bill takes place with all the details needed. It is user friendly program.

  • Conclusion

From this project we learnt the usage of Swing in JAVA. Designing an interface is also learnt. We also got the knowledge of event handling and its implementation. We also learnt using various components like Jframe, combobox, lable and textfield. We also implemented the knowledge gained in the class and put it in the practice.

References

  1. https://www.javatpoint.com/java-swing

Introduce Yourself (Example Post)

This is an example post, originally published as part of Blogging University. Enroll in one of our ten programs, and start your blog right.

You’re going to publish a post today. Don’t worry about how your blog looks. Don’t worry if you haven’t given it a name yet, or you’re feeling overwhelmed. Just click the “New Post” button, and tell us why you’re here.

Why do this?

  • Because it gives new readers context. What are you about? Why should they read your blog?
  • Because it will help you focus you own ideas about your blog and what you’d like to do with it.

The post can be short or long, a personal intro to your life or a bloggy mission statement, a manifesto for the future or a simple outline of your the types of things you hope to publish.

To help you get started, here are a few questions:

  • Why are you blogging publicly, rather than keeping a personal journal?
  • What topics do you think you’ll write about?
  • Who would you love to connect with via your blog?
  • If you blog successfully throughout the next year, what would you hope to have accomplished?

You’re not locked into any of this; one of the wonderful things about blogs is how they constantly evolve as we learn, grow, and interact with one another — but it’s good to know where and why you started, and articulating your goals may just give you a few other post ideas.

Can’t think how to get started? Just write the first thing that pops into your head. Anne Lamott, author of a book on writing we love, says that you need to give yourself permission to write a “crappy first draft”. Anne makes a great point — just start writing, and worry about editing it later.

When you’re ready to publish, give your post three to five tags that describe your blog’s focus — writing, photography, fiction, parenting, food, cars, movies, sports, whatever. These tags will help others who care about your topics find you in the Reader. Make sure one of the tags is “zerotohero,” so other new bloggers can find you, too.

Design a site like this with WordPress.com
Get started